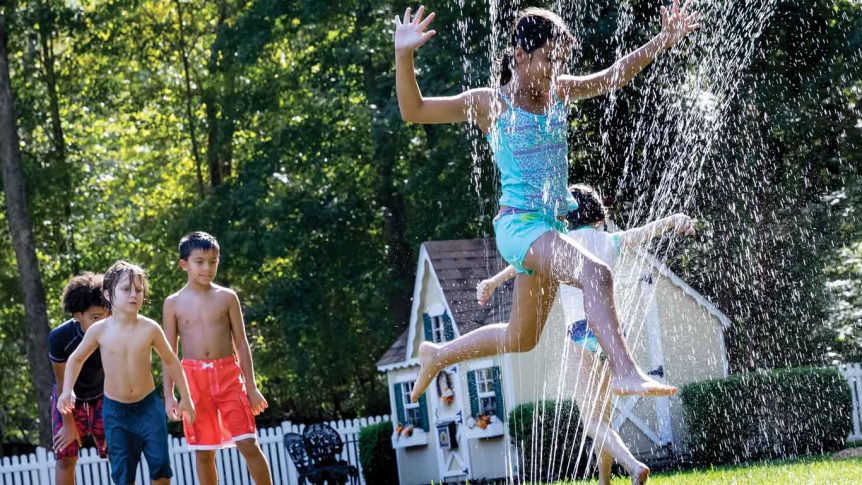
The backyard is home to many memories worthy of committing to film, or the cloud as technology would have it today. It may be a perfectly grown rose, a casual afternoon of play with the kids, or the marking of a special occasion such as a graduation or birthday that causes you to reach for your camera or your phone to snap a quick picture. Too often the resulting image doesn’t do justice to the subject. Here are a few tips to help improve the odds of capturing a photo worthy of printing and display.
- Shoot During the Golden Hours
Light is the most critical component of photography and not all light is created equal. Truly memorable photos are usually the product of fantastic light. In outdoor photography, the harsh midday sun should generally be avoided if possible. The bright, direct rays will wash out colors and cast unflattering shadows on faces and other photo subjects.
In the morning and evening, the light takes on a warm tone, helping bring out rich, vibrant colors. And with the light coming from the side, shadows are more manageable and flattering. The hour directly after sunrise and directly before sunset are considered the “Golden Hours” for photography due to the spectacular light. But there is no hard time cutoff for taking the perfect picture. Rather think of the sun’s position in the sky as a gradient. The closer the sun is to its apex, the harsher the light. The closer it is to the horizon, the richer and more ideal the light becomes.
- Keep The Sun To Your Back
The rule for best lighting is the photographer should be between the subject and the sun, meaning the sun should be at the photographer’s back, or over their shoulder. The photographer can shift a bit to one side or the other to play with the resulting shadows cast on the subject.
Keep in mind that when the sun sits low in the sky it casts very long and interesting shadows, but it also produces a long shadow of the photographer. Be aware of where your shadow is and move as necessary to make sure it isn’t in the shot.
Don’t forget this rule when taking shots of active subjects, too. To capture the happy faces of children at play, be sure to still consider the sun and settle in a position where there’s a better chance of capturing the details of their happy faces. Shooting into the sun will yield that disappointing featureless shadow of a face resulting from backlighting.
That said, rules are meant to be broken. If the desired result is a silhouette, or maybe to capture sun glinting through the water of a sprinkler, feel free to switch it up and put the subject between the camera and the sun. This position can yield stunning images, but don’t expect to get much, if any, detail on the faces of people in the photo.
- Seek Out Diffuse Light
The direct light of the sun can be difficult to navigate for a novice photographer as there’s always shadows. Diffuse light, which is light that’s been bounced off other surfaces, provides a nice even light with greatly reduced or nonexistent shadows. A professional portrait photographer will create diffuse light by putting a flash behind a semitransparent material. In nature, an overcast sky gives the same result.
A blah grey sky may not send a photographer running for their camera like an epic sunset, but it should. The resulting beautiful light allows for great photos to be taken any time of day. This is perfect for portraits or snapping photos of prized flowers or gardens. It is not, however, the ideal light for landscape photos which usually include the sky. For all other pictures, look for angles that keep the uninteresting sky out of the image or at the very least minimize its presence.
Diffuse light can also be found on a sunny day in what is known as open shade. Open shade is a spot that’s in shade, but when you look up from the spot you can see the sky. While it appears in shadow, light is bouncing around the space providing ideal lighting especially for portraits. To photograph people, be sure they’re fully in the open shade and be aware of the background. The background should also be in open shade for even coloring in the resulting picture. If the background isn’t interesting, zoom in so only the person’s face is visible, effectively cutting out the clutter.
- Get Moving
Don’t just stand there taking photos. For more dynamic images move around and experiment with angles. If taking a photo of a flower try getting low, even laying on the ground, and shooting it from below. Or, get high. Stand on a chair, climb a ladder, find a perspective that is uncommon. For photos of kids especially, make the effort to get on their level.
Take photos from multiple positions to change up the background, but also be aware of the background. Pause to look around the viewfinder or preview screen to see if there’s anything in the background that might ruin the picture: an area of the yard that’s under construction, a brightly colored item, or any items that interact poorly with the subject. For instance, be sure a telephone pole in the background isn’t lined up perfectly with the subject’s head or it may look like they grew a strange horn.
Mostly, have fun and take lots of pictures to increase your odds of a keeper. Especially now that film is a relic of the past, it’s unlikely anyone has ever lamented taking too many photos.
Helpful links:

